Google+ Sandeepa On Life: photo

Pages

Search this blog

Showing posts with label photo. Show all posts

Tuesday, October 11, 2011

How to Import Orkut Photo Albums to Google+

When we opened Facebook accounts and started using it, most of us didn't bother importing photos or contacts from our Orkut profiles.

Now, most of us are on Google+, but we are still hooked to Facebook. Nobody is thinking seriously about moving to Google+ or copying content to it. However, Google thinks people may want to import their Orkut photo albums to Google+. So, they have introduced "Orkut Photo Album Importer".

If you have any important photo album on Orkut that you wish to import to Google+, here is how you can do it.
  1. Login to your Orkut account. You should see a banner like the one shown below.

    Link to Orkut Photo importer as displayed on orkut profile.

  2. If you can't see the link on your profile, you can direct access it here Orkut Photo Importer
  3. Click on the "Copy my Orkut photos to Google+ now" button, you will see a list of your photo albums. Select the ones you want to share on Google+.
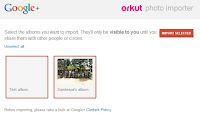
    Photo selection to share on Google+
  4. Click on the "Import Selected" button to start importing photos to Google+
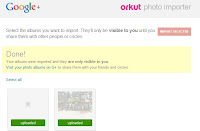
    Status after import.
  5. Now login to Google+ to see your new photos.
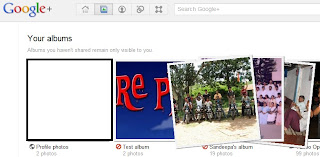
    Photo albums imported from Orkut.
  6. Don't forget to read Google's User Content and Conduct Policy before you import.

Monday, August 8, 2011

Picasa: How to add watermarks to photos

A friend mentioned today that it hurts when someone uses your photos and don't give you the credit for it. I completely understand his feelings. It happened with me. It happens with everybody!

There are many tools available to add watermarks to your photos. Here I'm going to tell you how to do it using Picasa. Because that's what I use!

You have to think about adding a watermark(some copyright) only when you are sharing the photo with others.  Using Picasa you can share photos with others mainly in two ways. By uploading them to a web album and sharing the link, or by exporting the photos to a folder.

We will see how to add watermark to your photos in both these cases.


  1. How to add watermarks while uploading photos to Picasa Web Album
    1. Open Picasa
    2. Goto Tools -> Options -> Web Albums
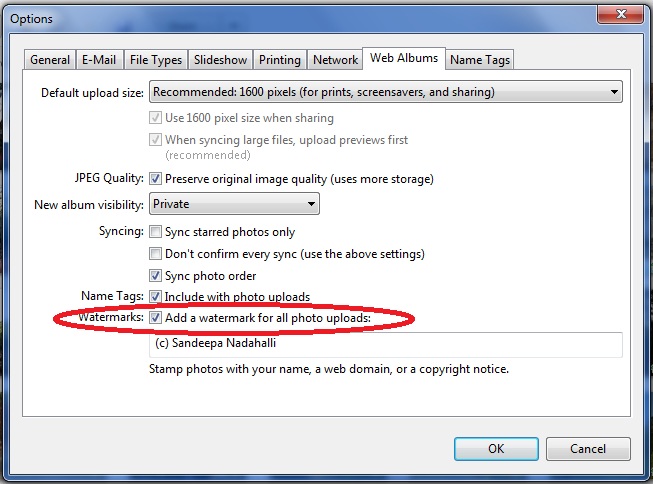
    3. In the dialog that pop's up,(see image below) select the check box for Watermarks.


    4. Enter the text for your water mark in the text box given. As you can see in the screenshot, I use "(c) Sandeepa Nadahalli".
    5. Click OK to exit the settings dialog. Your photos will be watermarked with the given text when you upload them.
  2. How to add watermarks while exporting photos from Picasa.
    1. Select the photos or Album you want to export
    2. Goto File -> Export Picture to Folder
    3. Select the check box next to Watermark:
    4. Enter the text to be used for watermarking.
    5. Click on the export button!
Here is a photo with a watermark (from my Picasa Web Album ).

Wednesday, June 8, 2011

How To Disable Facebook's Tag Suggestions

Yesterday Facebook rolled out a new feature called Tag Suggestions.

According to a blog post on The Facebook Blog, this is what the feature is all about:
"When you or a friend upload new photos, we use face recognition software—similar to that found in many photo editing tools—to match your new photos to other photos you're tagged in. We group similar photos together and, whenever possible, suggest the name of the friend in the photos."
Not surprisingly, this Face Recognition feature is enabled by default! This may be useful for some people who upload photos in bulk and tag everybody in every picture.

For others, if you don't want Facebook to automatically detect your face and suggest tag to friends, here's how you can disable this feature. It's very simple! (takes only 7 clicks!)

  1. Click on Account 
  2. Click on Privacy Settings

    Privacy Settings page
  3. Click on Customize settings

  4. Scroll down to "Things others share" section. Click on the Edit Settings next to
    Suggest photos of me to friends
    When photos look like me, suggest my name

  5. Click on Enabled and change it to Disabled
  6. Click on Okay to save that setting.
  7. Congratulations! Now you can continue with your Facebooking, or whatever else you were doing before coming here :-)